


Troubleshooting a car without a computer can feel overwhelming, especially when today's vehicles have more sensors than ever before. Yet, it turns out that you can still find up to 80 percent of the most common faults just through careful visual inspection and simple tests. It's the hood – not an app – that often reveals the most important clues about a car's health.
Table of Contents
- Step 1: Inspect the Vehicle's Exterior for Visible Damage
- Step 2: Carefully Check Engine Fluids and Levels
- Step 3: Perform a Visual Inspection of Electrical Components
- Step 4: Conduct Basic Tests on Battery and Ignition System
- Step 5: Analyze Sounds and Vibrations to Identify Problems
- Step 6: Summarize Findings and Plan for Repairs
Quick Summary
| Key Point | Explanation |
|---|---|
| 1. Carefully inspect the vehicle's exterior | Examining the car's exterior can identify early signs of damage or wear, which affects performance. |
| 2. Check engine fluids and levels | Correct fluid levels and quality can prevent mechanical problems, such as overheating and engine failure. |
| 3. Perform a visual inspection of electrical components | Damage to cables and connectors can cause short circuits and starting problems, so these must be checked carefully. |
| 4. Conduct tests on the battery and ignition system | Measure battery voltage and inspect spark plugs to reveal electrical problems affecting the car's function. |
| 5. Analyze sounds and vibrations while driving | Unusual sounds and vibrations can be early warning signs of mechanical problems that need addressing. |
Step 1: Inspect the Vehicle's Exterior for Visible Damage
When you begin troubleshooting without a computer, the first critical phase is to carefully inspect the vehicle's exterior condition. This visual check often reveals early signs of potential problems that could affect the vehicle's performance and safety. By methodically examining each part of the car's exterior, you can identify damage or wear that requires further investigation.
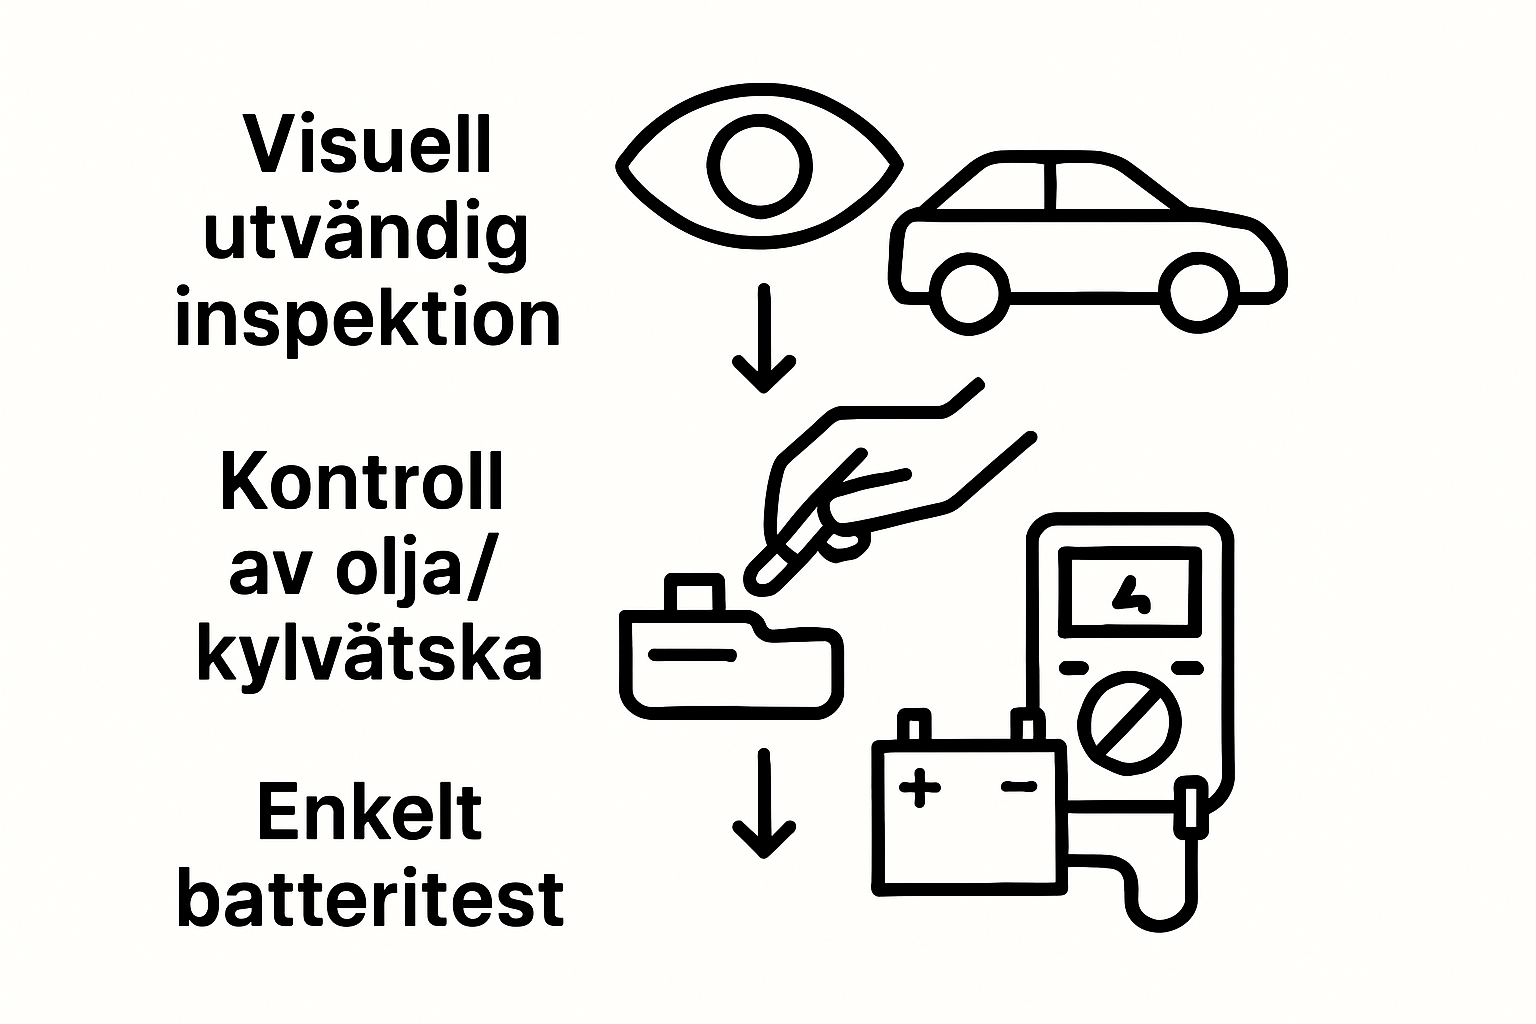
Start with a systematic review around the entire vehicle. First, position yourself a few meters away and observe the car's overall silhouette. Look for unevenness in the paint, dents, cracks, or areas where the paint appears to have faded or been damaged. These visual anomalies can indicate underlying mechanical problems or previous collision damage that is not immediately visible.
The next step is a more detailed inspection. Focus particularly on critical areas such as wheel arches, bumpers, hood, and side panels. Use daylight or a powerful flashlight to illuminate surfaces and reveal subtle damage. Pay attention to small cracks, scratches, or color discrepancies that may indicate microscopic structural changes. Some damage may seem insignificant but can signal more serious underlying problems.
Specifically note the following critical points during your inspection:
- Visible cracks or deformations on the bodywork
- Uneven paint shade which may indicate previous repairs
- Signs of rust attack or corrosion
- Dents or indentations that may affect the vehicle's aerodynamics
Conclude your exterior inspection by checking the condition of the tires. Examine tire tread, sidewalls, and any signs of uneven wear. Uneven tire wear can indicate alignment problems, suspension issues, or more complex mechanical failures that require further investigation. By carefully documenting and photographing any damage, you create thorough documentation that will be invaluable during your continued troubleshooting process.
Step 2: Carefully Check Engine Fluids and Levels
After conducting a thorough exterior inspection, the next crucial step in troubleshooting without a computer is to carefully check the vehicle's engine fluids. This process is essential for understanding the car's health status and preventing potential mechanical problems that may arise due to incorrect fluid volumes or quality.
Prepare by having the following equipment ready: A clean rag or paper towel, work gloves, and if possible, a flashlight for better visibility in the engine compartment. Start by parking the car on a level surface and letting the engine cool completely. Warm engine fluids can give incorrect readings and pose a safety risk.
Begin the check with the engine oil. Pull out the dipstick, wipe it clean with the rag, then reinsert it and pull it out again to get an accurate level reading. The oil level should be between the marked min and max lines. Observe the oil's color and consistency. A dark brown or black color can indicate old oil that needs changing, while a light brown color suggests good oil quality.
Continue with the coolant. Check the expansion tank and ensure the fluid is between the low and high markings. Be careful and never open the radiator when the engine is hot. A low coolant level can indicate leaks or overheating issues that require immediate attention.
Important points to document during the fluid check:
- Color and consistency of each fluid
- Exact levels relative to recommended ranges
- Signs of contamination or particles in the fluids
- Any visible leaks under the car
Conclude the check by learning more about diagnostic techniques that can complement this manual inspection. A thorough review of engine fluids will give you valuable insight into the vehicle's mechanical status and help you prevent potential faults before they develop into more serious problems.
Step 3: Perform a Visual Inspection of Electrical Components
After checking the engine fluids, the third critical phase in troubleshooting without a computer is a thorough visual inspection of the vehicle's electrical components. This process reveals potential problems that could affect the car's functionality and prevents future electrical failures that could lead to unexpected breakdowns.
Begin the inspection by opening the hood and focusing on the battery area. Carefully examine the battery terminals for signs of corrosion, white or green deposits, or loose connections. Corroded terminals can impede current transfer and cause starting problems. Use a clean cloth or a battery terminal brush to gently clean any oxidized surfaces, ensuring optimal electrical contacts.
Then, proceed with a systematic review of visible electrical wires and cables.
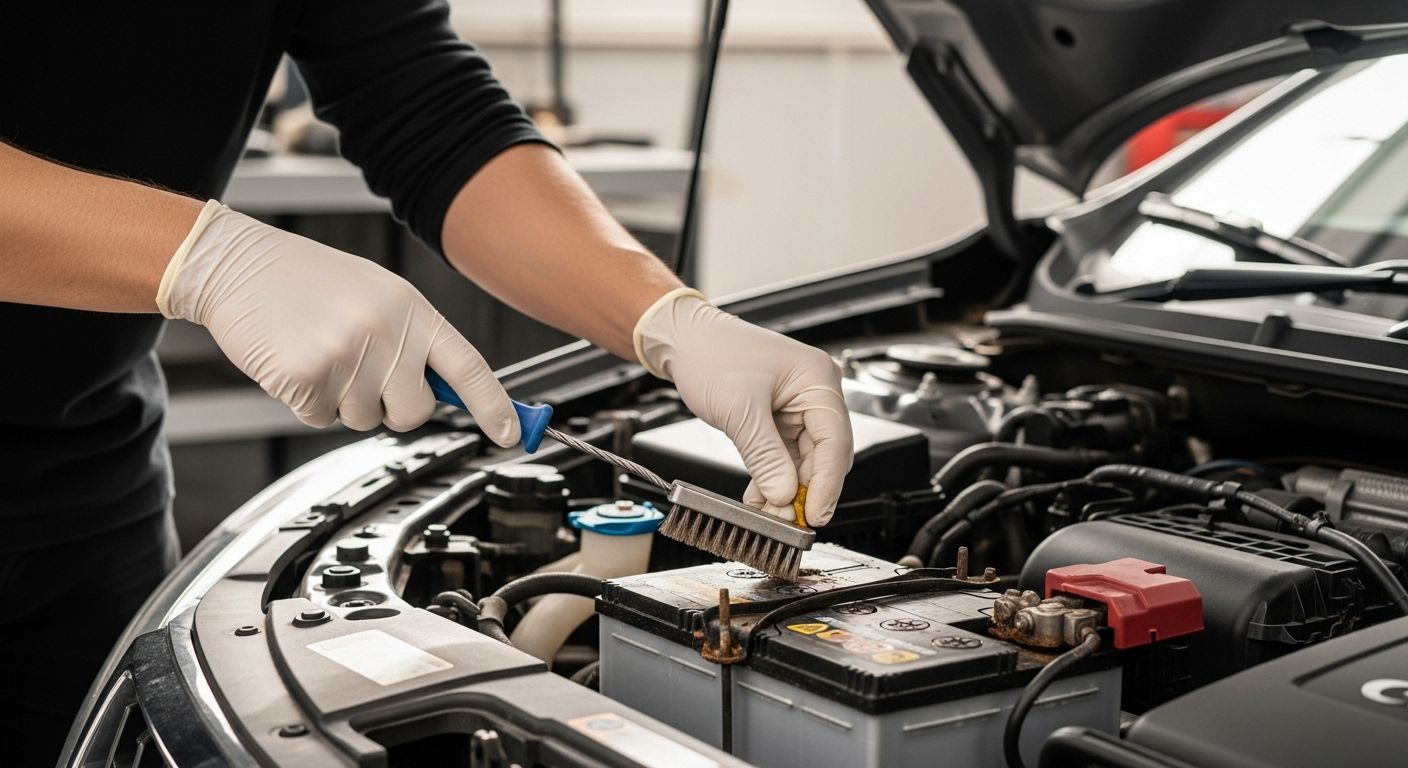
Pay attention to signs such as cracked insulation, chafing, melted sections, or loose connections. Damaged cables can cause short circuits, electrical failures, and potentially serious safety risks. Check wiring harnesses along the engine compartment, under the dashboard, and in door panels to identify any damage.
Important points to document during the electrical inspection:
- Visible damage to wires and cables
- Signs of corrosion at battery connections
- Loose or damaged electrical contacts
- Abnormal color changes or melt marks
Explore advanced diagnostic techniques that can complement this manual inspection. Conclude your electrical component inspection by checking the fuses. Locate the fuse box, usually found under the dashboard or in the engine compartment. Visually inspect the fuses for signs of burning or damage. A black or melted fuse indicates a potential electrical problem that requires further investigation. By methodically documenting your observations, you create a thorough report of the vehicle's electrical status.
Step 4: Conduct Basic Tests on Battery and Ignition System
After the previous visual inspections, the next crucial step in troubleshooting without a computer is to perform basic tests on the vehicle's battery and ignition system. This critical phase helps you identify potential electrical problems that could hinder the car's normal function and prevent unexpected breakdowns.
Begin testing by preparing some simple tools: a multimeter, protective gloves, and a clean rag. Start with the battery test by measuring the voltage directly at the battery terminals. Set the multimeter to DC voltage mode and place the red lead on the positive terminal and the black lead on the negative. A fully charged battery should show a voltage between 12.6 and 12.8 volts. Readings below 12.4 volts indicate that the battery needs charging or possibly replacement.
Then, proceed with the basic check of the ignition system. Observe the starting process when you turn the key and listen for any abnormal sounds. A jerky or slow starting process can indicate problems with the starter motor, battery, or ignition coil. Visually check the spark plugs for signs of wear, corrosion, or abnormal discoloration. Dark or white deposits on the spark plugs can signal fuel or combustion system problems.
Important points to document during the battery and ignition system test:
- Exactly measured battery voltage
- Starting process behavior and sounds
- Visual condition of the spark plugs
- Any deviations from normal electrical behavior
Deepen your diagnostic knowledge for more advanced troubleshooting techniques. Conclude the test by comparing your observations with the car's normal performance. If you discover any discrepancies, this may indicate a need for further investigation or professional service. By methodically documenting and analyzing the results, you create a solid foundation for further troubleshooting of the vehicle's electrical system.
Step 5: Analyze Sounds and Vibrations to Identify Problems
Once you have completed previous inspections, the next crucial step in troubleshooting without a computer is to systematically analyze the sounds and vibrations that may reveal hidden mechanical problems in your vehicle. This process requires an attentive and methodical approach to interpret the signals the car sends through unusual noises and movement patterns.
Start by driving the car under controlled conditions at various speeds and road conditions. Begin at low speeds in a safe area, such as an empty parking lot. Listen carefully for scraping, knocking, whistling, or grinding noises from different parts of the vehicle. Pay particular attention to sounds that change when you accelerate, brake, or turn. A dull thumping from the engine could indicate crankshaft problems, while a sharp squealing from the brake discs might suggest worn brake pads.
While driving, be extremely sensitive to vibrations. Observe vibrations through the steering wheel, floor, or seat that could signal underlying mechanical issues. A vibration at specific speeds might indicate unbalanced tires, worn driveshaft, or suspension problems. Differences in vibration patterns when driving straight compared to turning can provide valuable information about the vehicle's mechanical status.
Important points to document during the sound and vibration analysis:
- Exact location and timing of each unusual sound
- Speed and driving situation when vibrations occur
- Description of the sound's character (dull, sharp, intermittent)
- Any changes in the vehicle's behavior
Deepen your diagnostic skills for more advanced troubleshooting. Conclude the analysis by comparing your notes with the car's normal behavior. Document every deviation carefully, as these sounds and vibrations can be early warning signs of potential mechanical problems that require further investigation or professional service.
Step 6: Summarize Findings and Plan for Repairs
After the extensive inspections and tests, the final phase in troubleshooting without a computer is to systematically summarize your findings and develop a strategic repair plan. This critical phase transforms your observations into a concrete action plan to restore the vehicle's optimal performance and prevent future problems.
Begin by organizing all notes and documentation from previous steps into a structured report. Create a document where you categorize your findings by severity and type of problem. Divide observations into three main categories: immediate actions, planned repairs, and continued monitoring. Immediate actions include issues that directly affect the vehicle's safety or functionality, such as damaged electrical components or critical fluid leaks.
The next step is to prioritize and estimate the costs for the identified problems. Research average repair costs for each specific component or system that requires attention. This helps you create a realistic budget and determine whether certain repairs can be performed yourself or require professional help. Pay particular attention to components that, if not addressed, could lead to more extensive and costly damage down the road.
Key points to include in your repair plan:
- Prioritized safety-relevant issues
- Estimated costs for each repair
- Timeframe for implementing actions
- Possible DIY repairs versus professional service
Explore more detailed diagnostic strategies for continued troubleshooting. Conclude planning by creating a clear timeline for implementation. Document each step carefully and be prepared to adjust the plan as you gain more information. By systematically summarizing your findings and creating a well-thought-out repair plan, you ensure an efficient and cost-conscious approach to maintaining your vehicle's health and performance.
Take the Next Step from Manual Troubleshooting to Smarter Car Care
Have you spent hours meticulously analyzing sounds, vibrations, and engine fluids to find faults in your car? It's easy to feel uncertain when hidden problems don't provide clear answers through visual inspection and simple tests alone. Despite structured steps for inspecting the exterior, electrical components, and ignition system, there's a risk that important faults may still be missed. With modern diagnostic tools, you can quickly access fault codes and clear answers that would otherwise require expensive workshop visits.

Discover how much easier and more secure car ownership becomes with the right tools. At Felkodslasare.se, you'll find everything from advanced fault code readers to smart diagnostic cables and accessories. Explore our guides and learn how to use ELM327 or Maxiecu to immediately identify faults without guessing. Visit Felkodslasare.se today to start saving time, money, and stress the next time your car shows symptoms of problems.
Frequently Asked Questions
How do I inspect the vehicle's exterior for damage?
To inspect the vehicle's exterior, start with a visual check of the entire car. Look at the paint, bumpers, and critical areas like wheel arches and side panels for visible damage such as cracks, dents, or rust. Use good lighting to see subtle damage.
What should I check regarding engine fluids?
Check the engine oil and coolant by pulling out the dipstick and inspecting the levels against the min and max marks. Also ensure the oil's color is correct; dark oil may indicate a need for replacement. For the coolant, check that the level is between the low and high markings.
How do I perform a visual inspection of the car's electrical components?
Open the hood and examine the battery terminals for corrosion and loose connections. Also inspect wires and cables for cracks, fraying, or melted parts. Also check the fuses to identify any damage.
What tests can I do on the battery and ignition system?
Use a multimeter to measure the battery voltage. A voltage below 12.4 volts indicates that it needs to be charged. Listen for unusual sounds during the starting process and check the spark plugs for damage or wear. Document any deviations.